
Gatsby Source Plugin Notion
💫 Use Notion as the CMS for your Gatsby site, multiple databases and pages via the official API.
• Quick Start • Usage • Known Limitations • FAQ • About •


Tired of committing markdown files to your git repo for every new blog post? Having colleagues who don’t know how to git commit? or simply you don’t want to introduce an additional toolset (CMS) to manage the content of your website?
gatsby-source-notion is a solution for you manage the content of your Gatsby site without any
Features
- 👉 Allow you to build a website with content from your Notion databases or pages
- 💈 Page contents in markdown!
- ⌨️ Title and their properties in plain text accessible via the front matter
- 🖼️ URL for cover image and icon!
- 🔮 All page properties accessible via GraphQL
- 🍻 Support for
remarkandmdx - 👀 Near real-time preview in development mode
Quick Start
Step 0 - Install the source plugin
npm install --save-dev gatsby-source-notionOptionally, if you want markdown support,
it’s recommended to have gatsby-plugin-mdx installed as well.
npm install --save-dev gatsby-source-notion gatsby-plugin-mdxStep 1 - Get your access token
Follow the official integration guide.
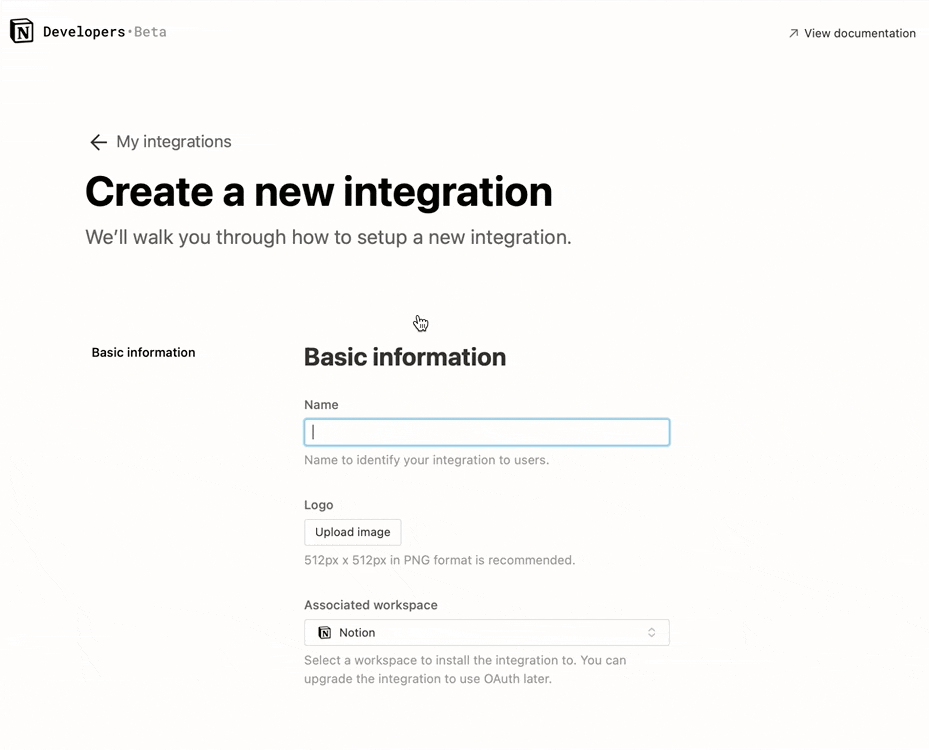
- Go to https://www.notion.com/my-integrations.
- Click the
+ New integrationbutton. - Give your integration a name, for example
My Gatsby Website. - Select the workspace where you want this plugin to get content from.
- Click
Submitto create the integration. - Copy the
Internal Integration Tokenon the next page and export it to theGATSBY_NOTION_TOKENenvironment variable.
Step 2 - Specify the databases and pages you allow this plugin to access
Integrations don’t have access to any databases or pages in the workspace initially. For the plugin to access content, you must share a specific database or page with the integration.
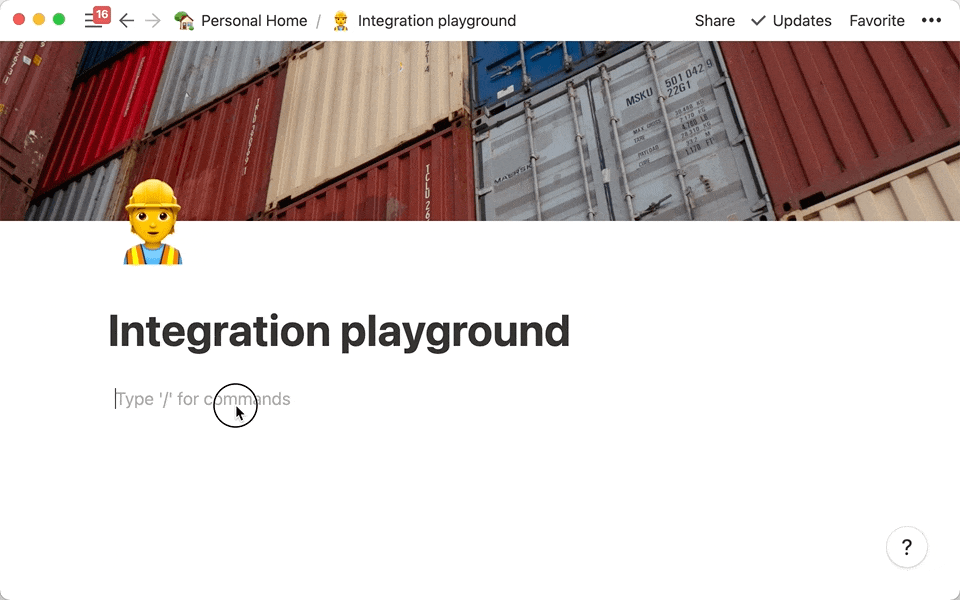
- Open the page or database in which your content sits.
- Click the
Sharebutton and select your integration by its name, then clickInvite. - Repeat for each of the content resource you want to use for building your Gatsby website.
NOTE Alternative to sharing your databases and pages one by one, you can also choose to grant access to all databases and pages to your integration in the Members section in the workspace settings.
However, it is not advisable to do this because that will grant unnecessary access which is bad for security.
IMPORTANT For each of your shared databases or pages, remember to record the UUID. You will need to specify them in the config.
The UUID of a database can be obtained from your database URL.
One way to get this information is by using your own database URL which has the following format:
https://www.notion.so/<your workspace>/<database UUID>?some_query_string
https://www.notion.so/<your workspace>/<page title>-<page UUID>
Step 3 - Setup the plugin in your gatsby site
IMPORTANT For security reasons, it’s recommended to specify the API access token via the GATSBY_NOTION_TOKEN environment variable.
In your gatsby-config, add gatsby-source-notion with settings something like:
{
  resolve: 'gatsby-source-notion',
  options: {
    databases: ['<< your database UUID >>'],
    pages: ['<< your page UUID >>'],
  },
};
NOTE Alternatively, you can specify the databases and pages via the GATSBY_NOTION_DATABASES and GATSBY_NOTION_PAGES environment variables separated by a comma ,.
Step 4 - Create pages with your content stored in Notion
IMPORTANT In this step, assume that you have gatsby-plugin-mdx installed and there is a path property in your database page.
Here is an example in TypeScript. A JS implementation would follow the same logic:
/* gatsby-node */
import type { GatsbyNode } from 'gatsby';

// types generated from a code generator such as `gatsby-plugin-graphql-codegen`
import type { BlogsQuery } from '@graphql';

export const createPages: GatsbyNode['createPages'] = async ({
  actions,
  graphql,
}) => {
  const { createPage } = actions;

  const response = await graphql<BlogsQuery>(`
    query Blogs {
      notionDatabase(ref: { eq: "<< your database UUID >>" }) {
        childrenNotionPage {
          childMdx {
            id
            frontmatter {
              path
            }
          }
        }
      }
    }
  `);

  response?.data?.notionDatabase?.childrenNotionPage?.forEach((page) => {
    const mdx = page?.childMdx;

    const path = mdx?.frontmatter?.path;

    if (mdx && path) {
      createPage({
        path,
        // NOTE: must resolve to the absolute path of the component
        component: resolve('<< path to your page component >>'),
        context: {
          id: mdx.id,
        },
      });
    }
  });
};
/* you page component */
import React from 'react';
import { graphql } from 'gatsby';
import { MDXRenderer } from 'gatsby-plugin-mdx';
import { Layout } from '<< path to your layout component >>';
import type { PageProps } from 'gatsby';
// types generated from a code generator such as `gatsby-plugin-graphql-codegen`
import type { BlogQuery } from '@graphql';
const Blog: React.FC<PageProps<BlogQuery>> = ({ data }) => {
// since this page is referred from the createPages API, it's safe to assume the mdx node is there
const mdx = data.mdx!;
const title = mdx.frontmatter?.title;
const body = mdx.body;
return (
<Layout>
<h1>{title}</h1>
<MDXRenderer>{body}</MDXRenderer>
</Layout>
);
};
export const pageQuery = graphql`
query Blog($id: String!) {
mdx(id: { eq: $id }) {
frontmatter {
title
}
body
}
}
`;
export default Blog;Usage
At this point, you should have an idea of how to use gatsby-source-notion. To make your experience even better, you can also configure a few more things:
/* plugin options you can specify in `gatsby-config` */
interface PluginConfig {
  /** access token, default to be the environment variable GATSBY_NOTION_TOKEN */
  token?: string;
  /** api version, default to be 2021-05-13 */
  version?: string;
  /** UUID of databases to be sourced, default to be `[]` i.e. none */
  databases?: string[];
  /** UUID of pages to be sourced, default to be `[]` i.e. none */
  pages?: string[];
  /** the number of api calls per seconds allowed for preview, 0 to disable preview default to be 2.5 */
  previewCallRate?: number;
  /** TTL settings for each API call types, default to cache database metadata and blocks */
  previewTTL?: {
    /** the number of seconds in which a database metadata will be cached, default to be 0 i.e. permanent */
    databaseMeta?: number;
    /** the number of seconds in which a metadata of a database's entries will be cached, default to be 0.5 */
    databaseEntries?: number;
    /** the number of seconds in which a page metadata will be cached, default to be 0.5 */
    pageMeta?: number;
    /** the number of seconds in which a page content will be cached, default to be 0 i.e. permanent */
    pageContent?: number;
  };
}
Preview Mode
This plugin ships with a preview mode by default and it is enabled. Start your development server and type on your Notion page to see the content get updated on the Gatsby website.
Under the hood, this plugin automatically pulls the page metadata from Notion regularly and checks for any updates using the last_edited_time property.
When a change is detected, this plugin will reload the content automatically.
NOTE To adjust the frequency of update, you can specify the maximum allowed number of API calls. The higher the more frequently it checks for updates. The actual frequency will be computed automatically according to your needs but be mindful of current limits for Notion API which is 3 requests per second at time of publishing.
NOTE Unlike other integrations with preview, such as gatsby-source-sanity, this plugin can’t sync any content from your Notion document that wasn’t saved.
Notion has autosaving, but it is delayed so you might not see an immediate change in preview.
Don’t worry though, because it’s only a matter of time before you see the change.

Known Limitations
As this plugin relies on the the official Notion API which is still in beta, we share the same limitations as the API.
- Currently, only text-based blocks can be extracted via this API. i.e. Items such as embedded PDFs are not supported.
- If you have a very long or sizing page, be aware that the official Notion API has a limit of maximum size of 1000 block elements and 500kb.
Currently, there is no way we can get data beyond that. - Indentation is only supported for lists such as bullets, numbers and to-do lists. Other text will not be indented due to the limitations of the markdown format.
- Due to GraphQL’s limitation, property names with non-alphanumeric characters, such as a space
_automatically. You may run into conflicts if you have two properties (e.g.,Property NameandProperty_Name) whose names are close but differ in these characters.
Unsupported Blocks
- Sub Page
- Call out
- Video
- Code Block
- Coloured Text
- Underlined Text
Image
Since v3.3, gatsby-source-notion provided a limited support for images on a Notion page.
Now, all images on a Notion page will be translated into the  syntax and subsequently converted to a img element if you use gatsby-plugin-mdx.
However, it has a caveat. Embedding images would probably be missing in your final web site. It is because the embedded image URL returned from Notion is valid only for 1 hour. This is a restriction from Notion. As gatsby would not download the image for further processing, you simply cannot use Notion as your image host.
Plugins like gatsby-remark-images-anywhere would solve the issue.
However, as of 2022-07-01 there is no similar plugin that supports Gatsby V4.
Let us know if you find any.
Cover & Icon
Now, cover image and icon are accessible as part of pages’ metadata.
For cover image, the URL for it is exported via coverImage.
For Icon, if it is an image, its URL will be supplied in iconImage;
if it is an emoji, its value will be supplied in iconEmoji.
They can also be found within the frontmatter of the MDX export.
FAQ
-
How can I specify different databases and pages for different environments, such as those used by staging, or production? You can specify the database or page UUIDs in the
GATSBY_NOTION_DATABASESandGATSBY_NOTION_PAGESenvironment variables, separated by a comma. -
I encountered a 404 error from the plugin, what happened? You may forget to grant the integration access to the database or page specified in the config. Check if you’ve given it permissions, or if any of the UUIDs contain typos.
-
What can I do if I don’t want to permanently delete a post but just hide it for awhile? You can create a page property (for example, a publish double checkbox) and use this information in your page creation process. If you’re in the development mode with preview enabled, you should be able to see the removal in near real-time.
-
Since the introduction of access capabilities in Notion API in Dec 2021, some content may be unexpectedly missing from the return due to access control granted to the API client. Make sure the API client has
readpermission to all of the content you want to output.
About
This source plugin is built on the official Notion API. If you are interested in using it as well, here is a Postman collection you can explore. Also follow the official API documentation to learn more about how to use it.
Contributing
Any new ideas? or got a bug? We definitely would love to have your contribution!
Feel free to open a discussion, report a bug or ask for a new feature via issues.
Further, read the contribution guide for the detail of the code structure and useful commands etc.
License
Copyright © 2021, Alvis Tang. Released under the MIT License.